How to Choose the Right Insulated Terminals?
Choosing Insulated Terminals is not just a matter of matching a wire to a connector; it affects the reliability of the finished connection. The right choice depends on conductor size, current, voltage, temperature, vibration, and exposure to oil or moisture. Start by checking the wire gauge and conductor material, then confirm the terminal’s barrel and insulation suit both. A ring terminal may fit a bolted stud, while a spade style can make routine servicing easier. A quick glance is not enough. Small details matter.
Inspect the insulation for damage and check the product specifications for its rated wire range and operating conditions. Color can help identify a size, but color codes are not universal, so verify the manufacturer’s information. Consider the crimping tool, too. A terminal that fits the wire may still fail if the tool does not create a secure, repeatable crimp. In a panel, a loose connection can be hard to spot until heat or intermittent operation appears. Even a careful selection cannot replace a sound installation. There is rarely one perfect terminal for every job, and that is worth remembering. This guide looks at terminal types, materials, sizing, environmental demands, and practical checks before purchase. It aims to make the decision clearer without treating a simple-looking connector as foolproof.
Understanding Insulated Terminals and Their Main Types
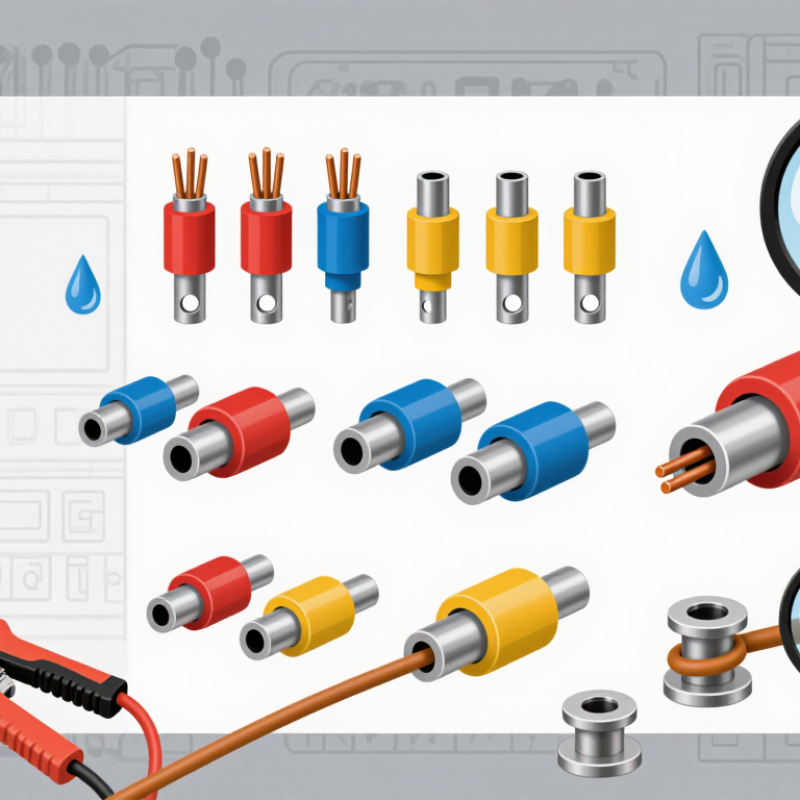
Insulated terminals join a conductor to a device or another wire while covering the metal barrel. That sleeve helps reduce accidental contact, but it does not correct a poor crimp. Ring terminals encircle a screw or stud, making them useful where vibration could loosen a connection. Fork terminals slide beneath a loosened screw and allow faster removal. Quick-disconnect terminals pair male and female blades for serviceable connections. Butt splices join two wires end to end; pin terminals fit screw-clamp blocks. Match the terminal opening and wire gauge to the actual hardware and conductor.
Insulation materials vary. PVC is common for general indoor use, while nylon sleeves often tolerate higher temperatures and handling. Heat-shrink terminals add a sealing layer when properly heated, though they still need a compatible crimp tool. Check the conductor’s stranding, terminal temperature rating, current requirement, and exposure to moisture or vibration. UL 486A-486B sets performance requirements for wire connectors and soldering lugs; it is a useful reference, not a substitute for checking the product’s specifications. Details matter.
The U.S. Bureau of Labor Statistics recorded 126 fatal work injuries involving exposure to electricity in its 2022 Census of Fatal Occupational Injuries. That figure does not attribute incidents to terminals, but it underscores why electrical connections deserve careful handling. A slightly oversized barrel can look acceptable and still grip poorly. I would verify the crimp with a pull test and inspect the insulation for cuts. It is easy to rush this step.
How to Choose the Right Insulated Terminals? - Understanding Insulated Terminals and Their Main Types
| Terminal Type | Typical Design | Common Use | Key Selection Checks |
| Ring terminal | A closed metal ring with a crimp barrel and an insulating sleeve. | Securing a wire to a stud or screw terminal where a dependable, retained connection is needed. | Match the ring’s inner diameter to the stud, and check wire range, conductor material, and crimp-tool compatibility. |
| Fork (spade) terminal | An open-ended fork-shaped tongue that fits beneath a screw head. | Connections that need to be installed or removed without completely taking out the fastener. | Check screw size and fork width; use a ring terminal instead when the connection must be more resistant to slipping off. |
| Quick-disconnect terminal | A mating male tab and female receptacle, often supplied with insulated sleeves or covers. | Appliances, control panels, and other equipment where connections may need to be disconnected for service. | Match tab width and thickness, mating style, wire range, and the terminal’s current and voltage ratings. |
| Butt splice | A tubular crimp connector with an insulated outer sleeve and wire entry at both ends. | Joining two wire ends in an end-to-end splice. | Choose a connector sized for both conductors and the environment; use a properly matched crimp tool and follow the specified stripping length. |
| Pin terminal | A crimped wire barrel ending in a narrow metal pin, with insulation around the barrel. | Inserting stranded wire into compatible terminal blocks or other pin-receptacle connections. | Confirm pin dimensions and terminal-block compatibility; do not assume it fits every clamp or push-in connection. |
| Insulated wire ferrule | A metal tube with an insulating collar that gathers the strands at the end of a stranded wire. | Preparing stranded conductors for compatible screw-clamp or spring-clamp terminals. | Match ferrule size to the conductor cross-section and terminal capacity; crimp with a suitable ferrule tool. |
| Insulation-piercing terminal | A connector that makes electrical contact through a conductor’s insulation when installed as designed. | Specific wiring applications where the terminal and conductor are explicitly designed for insulation-piercing connection. | Use only with compatible wire construction and size, and follow the specified installation method and ratings. |
Selection note: Verify conductor size, terminal dimensions, insulation material, temperature and electrical ratings, and required approvals against the product specification. Use the crimp tool and installation method specified for the terminal.
Identifying Electrical and Environmental Requirements
How to Choose the Right Insulated Terminals?
Identifying Electrical and Environmental Requirements
Start with the circuit, not the terminal’s color or appearance. Record operating voltage, expected current, conductor material, and wire size. Check that the terminal’s ratings cover the actual load, and allow for heat buildup inside crowded enclosures. A terminal that fits the wire may still be unsuitable for its current or temperature. Follow the manufacturer’s specified crimp tool and die; a loose crimp can create resistance and localized heating. Small details matter. NFPA’s Electrical Fires report estimates that electrical failure or malfunction was involved in an average of 46,700 U.S. home structure fires annually from 2015 to 2019. The report does not isolate terminal failures, but it underscores why sound connections matter.
Then assess the installation environment. Near a warm motor, compare the terminal’s temperature rating with the expected ambient temperature and any derating guidance. In damp, salty, or chemical-prone locations, check whether the insulation material is compatible with moisture, oil, solvents, and corrosion exposure. Vibration can loosen weak connections, so inspect the application’s mechanical demands and use suitable strain relief. For equipment exposed to dust or water, evaluate the enclosure’s protection separately; an insulated terminal alone does not make a connection watertight. Standards such as UL 486A-486B and IEC 60529 provide useful reference points for connector requirements and enclosure ingress protection. Not just the label. In practice, conditions can change after installation, and a rating is not a substitute for checking the actual operating temperature and fit.
Matching Terminal Shape and Size to the Wire and Connection
How to Choose the Right Insulated Terminals?
Matching Terminal Shape and Size to the Wire and Connection
Choose a terminal that fits both the conductor and the connection point. A ring terminal suits a stud that must stay secure under vibration. A fork terminal is easier to remove from a screw without fully withdrawing it. For a quick disconnect, match the terminal’s female width to the male tab; even a small mismatch can create a loose fit. Check the wire’s gauge and the terminal’s stated wire range, too. A barrel that is too large may not grip the strands evenly.
Fit matters for safety, not just convenience. The U.S. Bureau of Labor Statistics recorded 145 fatal occupational injuries involving exposure to electricity in 2022. That figure covers many hazards, but it underlines why electrical connections deserve careful checks. Match the terminal’s voltage and temperature ratings to the application, and confirm its insulation covers the intended crimp area. Strip only the specified length; exposed copper outside the barrel is easy to miss. I would still recheck the finished connection, especially when the wire is fine-stranded.
Tips: Compare the terminal opening with the actual stud or tab, not just its label. Use a crimping tool suited to the terminal, then tug gently on the wire. A clean-looking crimp can still be weak.
Selecting Insulation Material and Temperature Rating
How to Choose the Right Insulated Terminals?
Selecting Insulation Material and Temperature Rating
The insulation material must suit both the operating temperature and the terminal’s environment. PVC sleeves are common in general-purpose applications, while nylon can offer greater abrasion resistance. Silicone is often chosen for hotter conditions, but it may be less resistant to cuts. Exact limits vary by formulation and terminal design. Check the product’s stated continuous temperature rating, not just the material name.
A temperature rating is not a safe target to approach casually. Add ambient heat and heat generated by current at the connection; a crowded enclosure can run warmer than the room. UL 746B evaluates long-term thermal aging and establishes Relative Thermal Index values based on retained properties, commonly using a 100,000-hour endpoint. IEC 60216-1 also describes methods for assessing the thermal endurance of electrical insulating materials. These are material-aging measures, not guarantees that every installed terminal will last that long.
Look for a documented rating that covers the full assembly, including its insulation and conductor range. Then compare it with expected operating temperature and any short-term heat exposure during installation. One detail is easy to miss: a higher temperature rating does not compensate for a loose crimp. I would recheck the crimp specification, too. A small sample installation can reveal awkward fit or sleeve damage before work scales up.
How to Choose the Right Insulated Terminals?
Selecting Insulation Material and Temperature Rating
Compare the terminal’s expected operating temperature with the insulation’s rated continuous-use temperature. These values are typical reference points; actual ratings vary by product and construction. Always check the manufacturer’s specification and applicable standards.
Checking Crimping Compatibility and Installation Requirements
Choosing insulated terminals starts with matching the terminal barrel to the conductor, not just matching colors. Check the marked wire-size range, conductor material, insulation diameter, and operating temperature against the terminal datasheet. IEC 60352-2:2024 describes mechanical and electrical test methods for solderless crimped connections; it does not set one universal crimp force for every terminal. That distinction matters. A terminal designed for fine-stranded copper may not grip solid wire or aluminum correctly.
Check the tool and die against the terminal’s specified crimp profile. A mismatched die can leave a loose barrel, cut strands, or deform the insulation sleeve. Strip only the stated length: exposed copper should reach the barrel without extending past it. Keep insulation out of the crimp zone. UL 486A-486B covers wire-connector performance testing, including mechanical and electrical evaluations, so use terminals tested for the relevant application. Follow the terminal maker’s installation instructions and applicable equipment requirements. I still double-check this. A neat-looking crimp can conceal damaged strands; inspect sample crimps and use a pull test when the procedure specifies one. Record the tool, die, wire size, and inspection result, especially when several operators share a bench.
