How to Replace Your Cabin Filter for Cleaner Car Air?
The Cabin Filter plays a vital role in ensuring clean air inside your vehicle. It traps dust, pollen, and pollutants, creating a healthier driving environment. A dirty cabin filter can lead to unpleasant odors and reduced air quality. This affects your comfort and can even impact your focus on the road.
Replacing the cabin filter is an essential maintenance task that often gets overlooked. Many drivers may not realize how easy this process can be. However, it takes just a few simple steps to enhance air quality. You might be surprised by how much difference a new filter can make.
Neglecting to change your cabin filter regularly may result in more significant problems. Clogged filters can strain your car’s ventilation system. This may lead to costly repairs down the line. Hence, understanding the importance of a cabin filter is crucial for your vehicle’s longevity.
Understanding the Purpose of a Cabin Air Filter in Your Vehicle
The Cabin Air Filter plays a crucial role in maintaining air quality inside your vehicle. It filters out dust, pollen, and other harmful particles, providing cleaner air for passengers. According to industry reports, a clogged filter can reduce airflow by up to 50%. This can lead to an uncomfortable driving experience, especially for those with allergies.
Many drivers overlook the importance of replacing their cabin air filter. Studies show that only 30% of vehicle owners check their filters regularly. Inadequate maintenance can cause the filter to become ineffective, allowing pollutants to enter the cabin. A dirty filter can also strain the vehicle’s HVAC system, potentially leading to costly repairs.
It's shocking how much dust and allergens can accumulate over time. For example, a single cabin air filter can trap up to 95% of particles measuring 10 micrometers or larger. Regularly changing this filter can significantly improve air quality. Yet, some drivers forget this simple task, which can lead to health issues and discomfort. Neglecting such maintenance might seem trivial, but the consequences are far-reaching.
Cabin Air Filter Replacement Frequency and Impact on Air Quality
Signs That Indicate It's Time to Replace Your Cabin Air Filter
When it comes to keeping the air in your car clean, the cabin air filter plays a crucial role. There are several signs that indicate it might be time to replace it. If you notice reduced airflow from your vents, that’s a red flag. Often, this occurs when the filter is clogged with dust and debris. A simple check can reveal if it’s time for a change.
Another common sign is unpleasant odors. If your car smells musty or stale, the cabin air filter may be trapping moisture and bacteria. It's a reminder that clean air is essential for a pleasant driving experience. Sometimes, if you see visible dirt or dust around the filter area, it’s an alarming signal that your filter needs immediate attention. It’s easy to overlook these details, but ignoring them can lead to more significant issues down the line.
Also, pay attention to allergy symptoms while driving. If you frequently sneeze or have itchy eyes in your car, a dirty filter could be to blame. The filter should help trap pollen and pollutants. However, when it’s overwhelmed, it fails to perform its job. A more mindful approach to maintenance can improve your car’s air quality significantly.
Step-by-Step Guide to Locating Your Cabin Air Filter
Finding your cabin air filter can be easier than you think. Check your car manual for the exact location. Many filters are situated behind the glove box. Some cars may hide it under the dashboard. The layout varies by model, so a bit of research helps.
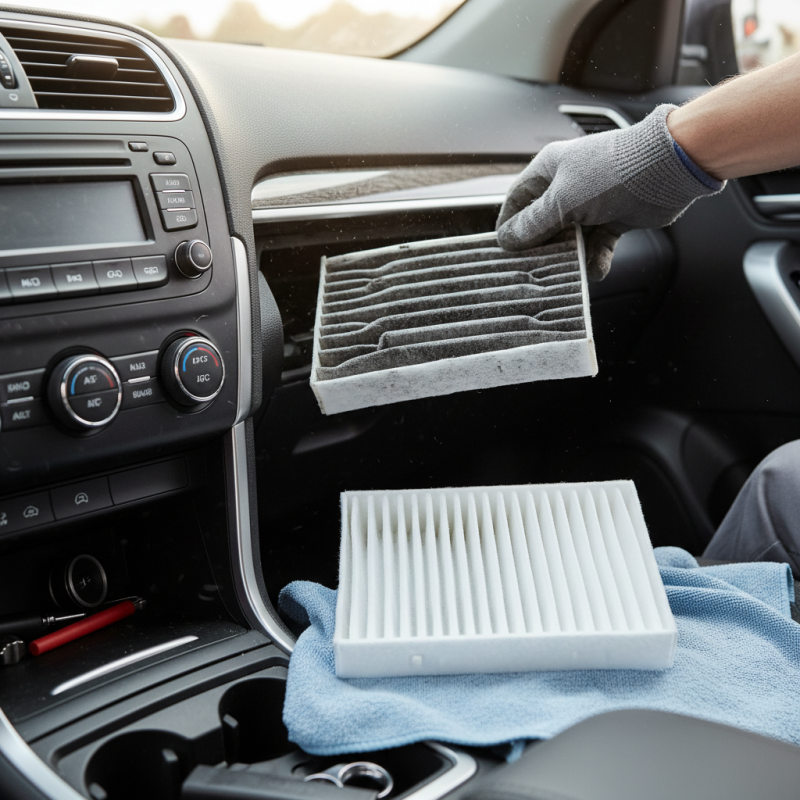
Remove any screws or clips holding the glove box in place. Gently lower it to reveal the filter compartment. Be cautious, as some parts may feel fragile. Once located, the filter can be pulled out easily. Inspect it for dirt and debris.
**Tip:** Always wear gloves when handling the filter. This keeps dirt off your hands and maintains cleanliness in your vehicle.
When installing a new filter, ensure it’s oriented correctly. Misalignment could reduce air quality. **Tip:** Take a picture before removing the old filter. Use it as a reference for installation.
Don’t rush through this process. If you encounter resistance, verify that all obstructions are removed. Keeping your car's air clean makes for a healthier ride.
Tools and Materials Needed for Cabin Filter Replacement
Replacing your cabin filter is essential for maintaining clean air in your vehicle. To start the replacement process, gather some basic tools and materials. You will need a ratchet set, a flathead screwdriver, and a new cabin air filter. It’s surprising how many people forget to check this simple component. According to a study by the Car Care Council, nearly 79% of vehicles had dirty air filters. This not only affects air quality but can also impact your health.
Before diving into the replacement, ensure you have a workspace ready. A clean garage or driveway is ideal. It's helpful to have a vacuum cleaner on hand. Dust and debris often accumulate in the filter area, and a quick clean-up can make a difference. A report from AAA found that many drivers overlook basic maintenance tasks, leading to inefficiencies in their car's performance.
Ensure you’re clear on the steps needed for removal. Take your time with each step to avoid breaking any clips holding the filter in place. It’s better to double-check your work than to rush. Many find this task daunting, but once you start, it becomes clear. Regular filter checks can significantly enhance air quality and improve overall driving comfort. Staying aware of cabin air standards can also help you maintain your vehicle in top shape.
Proper Installation Techniques for a New Cabin Air Filter
Replacing your cabin air filter is essential for maintaining clean air inside your vehicle. Begin by gathering a few tools. A screwdriver and a vacuum cleaner will be helpful for this task. Locate the cabin filter compartment, often found behind the glove box. Gently remove any obstruction, if necessary.
Before removing the old filter, take note of its orientation. This detail is vital for installing the new filter correctly. Dust and debris may fall out when removing the old filter. Be prepared to clean the area with a vacuum. Install the new filter in the same direction as the old one. It should fit snugly; check for gaps.
Once installed, reassemble any components you removed. It’s often easy to overlook steps, so take your time. A well-installed cabin filter can significantly improve air quality. Be mindful of mistakes while putting everything back together. Ensure everything is secure, as loose parts may rattle while driving. Regularly checking and replacing your cabin filter can lead to a more comfortable ride in the future.
How to Replace Your Cabin Filter for Cleaner Car Air? - Proper Installation Techniques for a New Cabin Air Filter
| Step | Description | Tools Needed | Estimated Time |
| 1 | Locate the cabin filter compartment, usually behind the glove box or under the dashboard. | None | 5 minutes |
| 2 | Remove applicable panels or screws to reach the filter. | Screwdriver | 10 minutes |
| 3 | Take out the old cabin air filter and check for dirt and debris. | None | 5 minutes |
| 4 | Install the new cabin air filter, ensuring the correct orientation based on airflow arrows. | None | 5 minutes |
| 5 | Reattach any panels or screws that were removed to access the filter. | Screwdriver | 5 minutes |
| 6 | Turn on the vehicle and test the airflow to ensure proper installation. | None | 5 minutes |